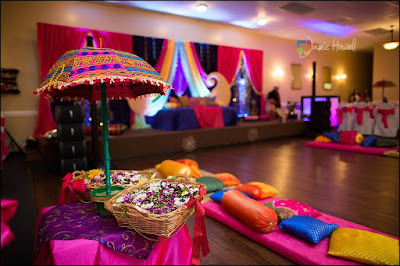
Although I have been married for about 2 years now, from
time to time, I still get messages from current brides-to-be who may have seen
some of my wedding event photos throughout the net or at a bridal show asking
about some of the DIY's I had done. One particular DIY that I STILL get emails
or messages about is the "overhead drop" that I made to walk under
during my festive mehndi/sangeet event. I regret that I DID NOT take photos of
each step during the DIY process (I was too busy being a over-stressed
bridezilla to even THINK about taking pictures of the steps at the time
LOL)...BUT, I did write out each step for you to follow! Enjoy and happy DIY...as
well as Happy Wedding..or whatever event you are making this for!
Need:
-Basic
lightweight curtain rods (2)---I used some old thin golden ones I had around
the house
-Hot glue
gun
-Needle and
thread
-Pearl
strings (found in wedding isle at Hobby Lobby)
-Fake
flowers (I used fake daisy's found at Hobby Lobby)--I am sure you can use real
flowers if you want BUT to me, those are just so delicate, I was afraid to
"hot glue" them.
-Large soft
satin ribbon (I used deep pink to match my theme)
Steps:
Step 1: Take
your flowers a part (meaning from the bud--bc you only need the flower not the
stick and leaves). The flower is usually made in layers and may fall apart.
When this happens, use hot glue to glue the layers back together OR use thread
and a needle to lightly stitch them together (like I did). Also, for the big
flowers, I didn't worry about putting the yellow middle piece back in.
Step 2:
Place your two rods opposite from one another as far as you like (on the
ground). This will depend on how long you want your piece to be at the end.
Step 3: Take
your pearl strings and start measuring out so it can be tied to each curtain
rod on each side. I made sure to measure out extra since I would be wrapping
the ends of the pearl string around the curtain rod to hold and would need a
little extra to make it easy for me to wrap/tie. Also, put as many as you would
like. I think I did about 10-12 strings so it wouldn't become too heavy.
Step 4: Once
you have all measured pearl strings cut, it is time to tie/wrap AND got glue
(to assure it is secure) around each curtain rod on each side.
Step 5: Time
to glue on your flowers on the pearl strings (randomly but somewhat evenly
too). This part can get tricky so when you are gluing each flower, try to make
sure that you are gluing it at the bottom side of the pearl to assure when the
entire piece is held up, most of the flowers are facing down. I think I may
have glued some on top and some on the bottom to get the look I got.
Step 6: Glue
some flowers along the entire curtain rod so you hide how you tied/glued the
pearl strings on the rod.
Step 7: Take
your ribbon and tie a large bow on all four sides of the rods. You can also add
another flower to each corner to assure a "clean" look and to camouflage
the curtain rods (lol).
Step 8: Lay
flat on a firm surface to assure nothing gets tangled before your big event. When
transferring to your event, fold in half and hold it.
I hope these
directions were simple and easy to follow. Please contact me if you are
confused about any step or have any questions. And, PLEASE do share your final
product with me!! I would love to see how creative you got with your overhead
flower drop.
xoxx-Nil
PS: Watch out for an upcoming post on DIY dandiyaa's and other quick and easy wedding/mehndi decor/DIYs! :)
All photo credit: Jamie Howell Photography
More Photos of the event at Maharani Weddings


No comments:
Post a Comment